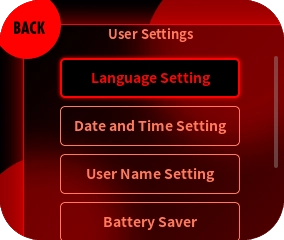
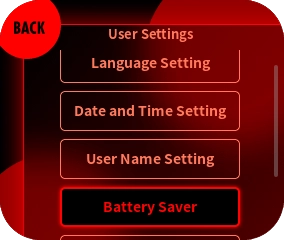
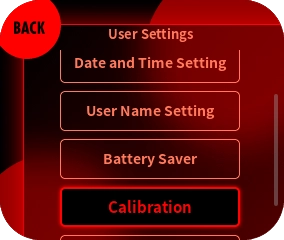
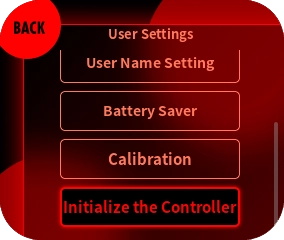
User Settings
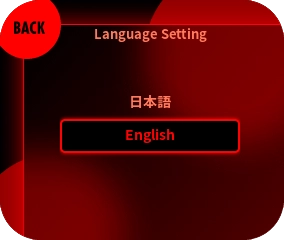
Language Setting
Select “Menu” > “User Settings” > “Language Settings” and select the language.
*You can select either Japanese or English.

Date and Time Setting
Select “Menu” -> “User Settings” -> “Date and Time Setting” to change the date and time.
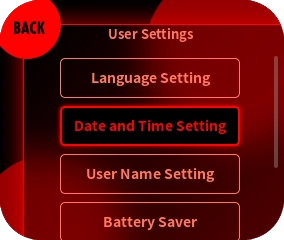
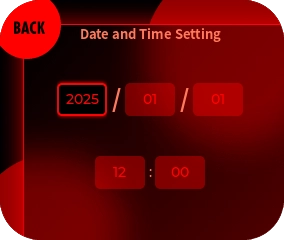
- The range of the year setting is from 2023 to 2060.
User Name Setting
Select “Menu” -> “User Settings” -> “User Name Setting” and enter the user name.
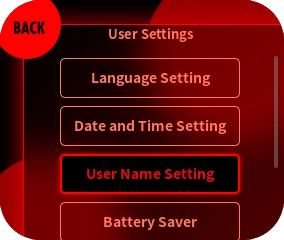
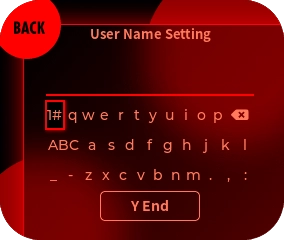
- The number of characters that can be entered is 8 alphanumeric symbols.
Battery Saver
Enables/disables the battery saver function.
Enabling the battery saver
Select “Menu” -> “User Settings” -> “Battery Saver” and toggle the “Enable Battery Saver” switch.
Toggle the “Enable Battery Saver” switch.
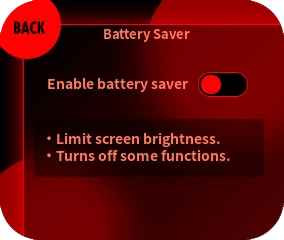
When the battery saver is enabled, the following conditions will occur.
- The backlight of the display will dim.
- LED lighting turns off.
- Vibration of the grip and ZL/ZR buttons will be disabled.
- Bluetooth® audio will be disabled.
Calibration
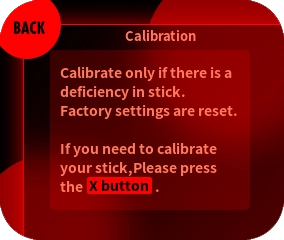
If the “L stick/R stick” does not work properly, calibration may improve the situation.
Performing calibration
Select “Menu” -> “User Settings” -> “Calibration”.
Press the X button to start calibration.
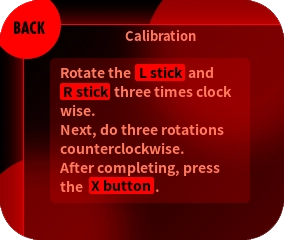
Turn the L stick and R stick in a wide circle in the order of “clockwise 3 times, counterclockwise 3 times”. When completed, press the X button to proceed to the next one.
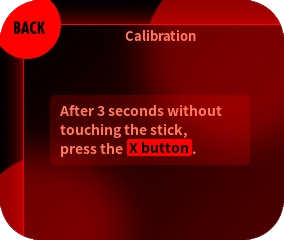
Wait for 3 seconds without touching the sticks. When completed, press the X button.
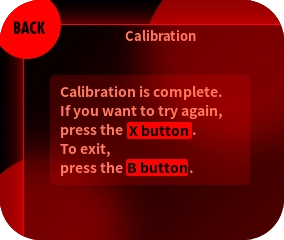
When “Calibration is complete...” is displayed, press the B button to exit. To redo the calibration, press the X button and restart from step ③.
- Since the factory calibration is initialized, please use this function only when there is a deficiency.
- When performing calibration, keep magnetic objects away from the controller. Otherwise, the calibration may not be performed correctly.
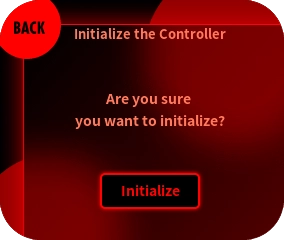
Initialize the Controller
Resets the controller settings to the factory defaults.
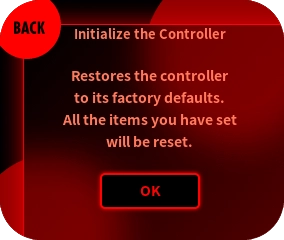
- When the controller is initialized, all information that has been set, such as profiles, will be deleted.
- If the firmware has been updated, the firmware before initialization is retained even if the controller is initialized.